
Note: Make sure that the control switch mounting location allows for knee clearance for clutch and/or brake operation.
Features:
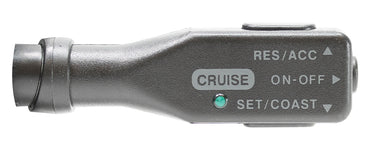
- Select a suitable mounting location on either the upper or lower steering column shroud. The mounting location for the control switch should be fairly flat and easy to reach. The graphics and the LED should also be visible so operation of the switch is easy.
- Mark the location of the control switch, and remove the steering column shroud.
- Drill a 3/8in� (9.5mm) diameter hole in the shroud at the location marked. Unthread the nut from the control switch and remove the nut, lockwasher and wedge.
- Insert wire harness through hole; insert threaded end of switch through hole. Reinstall wedge, lockwasher, and nut.
- Position control switch on shroud for driver convenience and the best viewing angle, and use a 9/16in� (14mm) wrench to tighten the nut.
- Route wire harness along steering column toward base of column. Be careful not to route the harness over sharp metal or in the tilt steering wheel mechanism.
- Install the 4-pin connector onto the control switch wires. inœRin�- RED, inœBin�- BROWN, inœGin�-GREEN, and inœYin�-YELLOW.
- Install the 2-pin connector onto the control switch wires. Using the 2-pin wire harness as a guide install the BLACK and BLUE wires.
- Plug the wire harness into the 2-pin connector and connect the two wires to the vehicle as follows using the self-stripping connectors provided:
- BLACK - Connect to a Chassis Ground.
- Lt. BLUE - Connect to a switched source that provides +12VDC when the ignition key is in the inœONin� position only.
LED Operation:
- Turn the ignition key to the inœONin� position. Depress the ON/OFF button on the switch to illuminate the LED. To turn the LED off, depress the ON/OFF button again or turn the ignition key to inœOFFin�.
This Cruise Control Switch is designed for vehicles with an upper or lower steering column shroud.
Brand: Rostra Accessories
Video

Safe & Secure Shopping

Copyright © 2025. All Rights Reserved

- Some one
- New York